How to Record the Screen on Windows 11/10 with 3 Methods
Screen recording on Windows has become increasingly popular over the years and for a good reason. It's an efficient way to record your computer screen's activity, making it a useful tool for creating tutorials, sharing presentations, or capturing moments from a video game. Whether you're using Windows 10 or 11, there are multiple screen recording methods available. In this article, we'll explore the built-in screen recording tool for Windows 10, two third-party software options, Movavi Screen Recorder and Filmora Screen Recorder, and provide some tips for successful screen recording.

Table of Contents
Built-in Screen Recording Methods for Windows 10 and 11
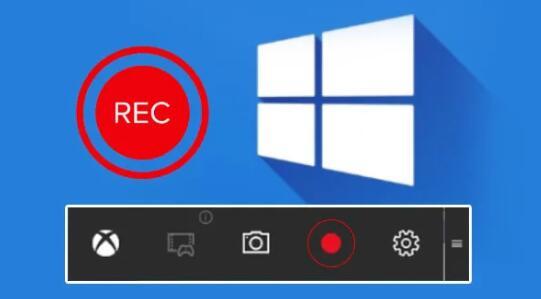
Windows 10 comes with a built-in screen recording tool, which is straightforward to use. The tool is called the Game Bar, and it's designed primarily for recording gameplay. However, it can record any app that's currently running on your computer, making it a versatile option.
How to Access Game Bar
To access the Game Bar, press the Windows key + G. If it's your first time using the tool, you may need to enable it by following the on-screen instructions. Once enabled, you'll be able to use the Game Bar to record your screen.
How to Use Game Bar to Record Your Screen on Windows 10
Using the Game Bar to record your screen is relatively simple. Once the tool is open, click the record button, or press the Windows key + Alt + R to start recording. To stop the recording, click the stop button or press the Windows key + Alt + R again. You'll find the recorded video in the Captures folder in your Videos library.

Easier Screen Recording Methods for Windows 10/11
While the built-in screen recording tool for Windows 10 and 11 is handy, it has some limitations. For instance, it doesn't offer many options for customizing your recordings or editing them. Fortunately, there are third-party software options available that can offer more functionality.
Two popular third-party screen recording software options for Windows 10 and 11 are Movavi Screen Recorder and Filmora Screen Recorder. Both offer a range of features that make a screen recording more accessible and customizable.
Pros of Using a Third-Party Windows Screen Recorder:
- More features: Third-party screen recorders often come with more advanced features such as video editing tools, multiple recording modes, and customizable settings.
- Better performance: Third-party screen recorders may be optimized for performance, resulting in smoother and more stable recordings.
- Improved quality: Third-party screen recorders may offer higher video and audio quality options, resulting in better-looking and sounding recordings.
- Compatibility: Third-party screen recorders may work with a broader range of software and hardware configurations than the built-in screen recorder.
Cons of Using a Third-Party Windows Screen Recorder:
- Cost: Many third-party screen recorders are not free, requiring a purchase or subscription to access their full features.
- Privacy concerns: Some third-party screen recorders may collect user data or have other privacy concerns, so it's important to choose a reputable and trustworthy program.
- Complexity: Third-party screen recorders may have a steeper learning curve and be more complex to use than the built-in screen recorder.
Why Movavi Screen Recorder
While Windows 10 and 11 have a built-in tool for screen recording called Game Bar, Movavi Screen Recorder offers more advantages over it. Including the flexibility to record any area of your screen, while Game Bar only allows you to record full screen or a single app window. More recording options you can choose from to record audio from your system, microphone, or both, and set the frame rate, video quality, and other settings to your liking. Additionally, you can edit your recordings after you've made them whereas Game Bar does not offer any editing tools.

In a word, Movavi Screen Recorder offers more features and flexibility than the built-in screen recording tool on Windows 10 and 11. Movavi Screen Recorder is an ideal solution when you need to record your screen regularly or need more control over the recording process.
To use Movavi Screen Recorder to record your screen on Windows 10 or 11, follow these steps:
Step 1: Download and install Movavi Screen Recorder.
Step 2: Open the software and select the capture area you want to record.
Step 3: Customize your recording settings, such as frame rate and audio source.
Step 4: Click the record button to start recording.
Step 5: Once you're finished, click the stop button to end the recording. You'll find the recorded video in the folder you specified.
Why Filmora Screen Recorder
Filmora Screen Recorder is another easy-to-use and high-quality screen recording software with customizable options and editing tools, making it a great choice for Windows 10 and 11 users.

With a simple and intuitive interface, it allows you to quickly start recording Windows screens without any technical knowledge. Record high-quality videos with customizable options for frame rate, resolution, and audio quality. Additionally, you can also use a variety of editing tools to enhance your recorded videos, including annotations, text overlays, and a built-in video editor.
To use Filmora Screen Recorder to record your screen on Windows 10 or 11, follow these steps:
Step 1: Download and install Filmora Screen Recorder from the official website.
Step 2: Open the software and select the capture area you want to record.
Step 3: Customize your recording settings, such as frame rate, audio source, frame rate, and video quality.
If you want to add webcam footage to your screen recording, click on the "Webcam" button and select your webcam device.
Step 4: Click the record button to start recording.
Step 5: Once you're finished, click the stop button to end the recording.
Step 6. Save your recording by clicking on the "Save" button. You can choose the output location and format for your video file.
Best Practices for Screen Recording on Windows 10 11
Step 1. Plan your recording ahead of time: Before you start recording, it's important to have a plan in place. Know what you're going to record, what you want to say, and how you're going to demonstrate it on the screen.
Step 2. Choose the right recording software: There are many different screen recording software options available, so it's important to choose the right one for your needs. Consider factors like the features you need, the quality of the recordings, and the cost.
Step 3. Check your equipment: Make sure your computer and recording equipment is working properly before you start recording. Test your microphone, camera, and any other hardware you'll be using.
Step 4. Prepare your environment: Choose a quiet and well-lit location for recording. Close any unnecessary windows and turn off notifications to minimize distractions.
Step 5. Use a script or outline: Having a script or outline can help you stay organized and focused while recording. It can also make it easier to edit the recording later.
Step 6. Practice makes perfect: Practice your recording before doing the final version. This will help you get comfortable with the software and ensure that everything is working correctly.
Troubleshooting Common Issues on Record Your Screen on Windows 10 11
1. Poor audio quality: Make sure your microphone is positioned correctly and there is no background noise. You may need to invest in a better microphone or use a noise-canceling program.
2. Laggy or choppy video: This can be caused by a slow computer or a high-resolution recording. Try reducing the resolution or using a more powerful computer.
3. Inconsistent lighting: Ensure that the lighting in the room is consistent throughout the recording. If necessary, invest in lighting equipment or adjust the camera settings.
4. Technical glitches: Technical glitches can happen, so it's important to save your work often and be prepared to troubleshoot issues as they arise. Consider keeping a checklist of common problems and solutions.
5. Distractions or interruptions: It's important to minimize distractions and interruptions while recording. Consider using a "Do Not Disturb" sign or setting your computer to "Do Not Disturb" mode to avoid notifications.

Conclusion
Screen recording on Windows 10 and 11 is helpful for various purposes, from creating video tutorials to capturing gameplay footage and promoting your digital marketing, etc. While the built-in Game Bar is a simple and easy-to-use option for basic screen recording needs, third-party tools like Movavi Screen Recorder offer more flexibility and customization options for users who need a more advanced screen recording solution.
Whether you're a teacher looking to create engaging instructional videos or a gamer who wants to share your gameplay with others, screen recording can help you accomplish your goals. With the right tools and techniques, you can create professional-quality recordings that capture every detail of your screen, unlock a world of possibilities and take your content creation to the next level.