How to Record Your Screen on Mac and MacBook with Sound
No matter whether you want to screen record on your Max to create tutorials or instructional videos, record gaming sessions and share highlights, tips, and tricks, record online meetings or presentations for taking notes, reviewing content later, sharing with colleagues, or create video content for social media or other purposes likewise, screen recording on a Mac can be a useful solution for individuals and business. Then, how to record the screen on Mac or MacBook? Keep reading.
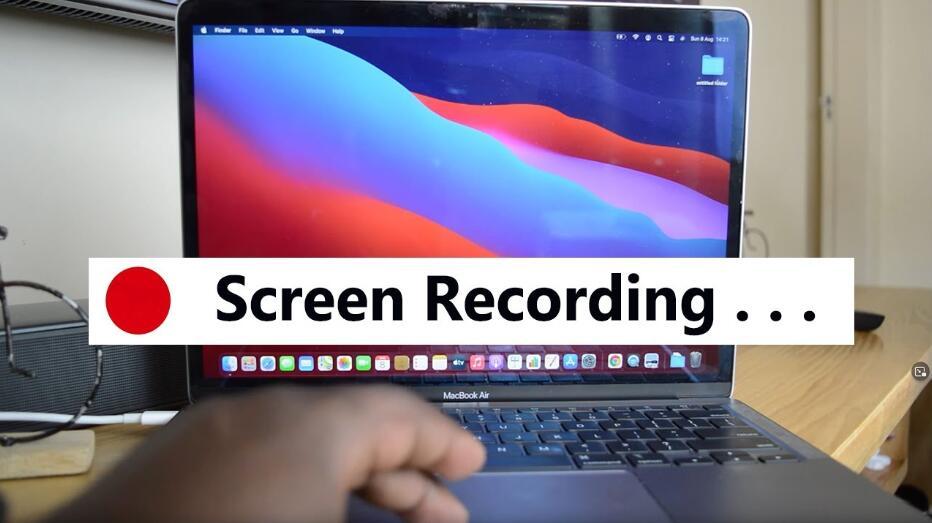
When users record their Mac screen, they typically have specific needs in mind, for example, record a Mac screen with sound, record a selected area, record with a webcam, record the screen and themselves, etc., In all cases, users typically require reliable screen recording software that offers high-quality output, flexible customization options, and intuitive editing tools to ensure that their recordings meet their specific needs.
Table of Contents
How to Record the Screen on Your Mac
Method 1. Use QuickTime Player
QuickTime Player is a media player software application for playing, recording and editing digital multimedia files. It was developed by Apple Inc. and is available for macOS operating systems. You can use QuickTime player to make a video recording of the entire screen or just a selected portion of it.
How to Record Screen on Mac with QuickTime
Here are the steps to use QuickTime to Record the Screen on Mac:
Step 1. Open QuickTime Player
The QuickTime player can be found in your Applications folder or by searching for it in Spotlight.
Step 2. Start a new screen recording
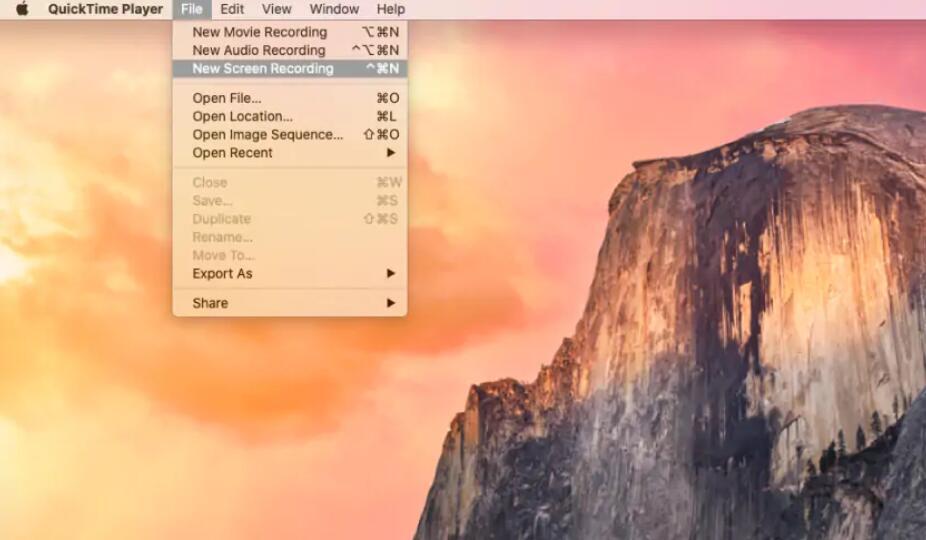
Click on File in the top menu bar and select New Screen Recording. Alternatively, you can use the keyboard shortcut Control + Command + N.
Step 3. Choose your recording settings
In the screen recording window that appears, you can choose to record either the entire screen or just a portion of it. You can also select whether to record audio from your computer's microphone or any connected external microphone.
Step 4. Start the recording
Click on the red Record button to start the screen recording. If you've chosen to record audio, you'll need to speak into your microphone or play audio on your computer to capture it.
Step 5. End the recording
To stop the recording, click on the Stop button in the menu bar, or press the Escape key on your keyboard.
Step 6. Save your recording
After stopping the recording, a preview window will appear where you can review the recording. You can choose to save the recording as a video file by clicking on the Save button in the menu bar. That's it!
Flexible Customization Options When Record Screen on Mac
When recording the screen on a Mac, users may require several flexible customization options to suit their specific needs. Here are some options that people might need:
1. Recording Area: Users may want to customize the recording area to capture only a particular portion of the screen, such as a specific application window, a section of the screen, or the entire screen.
2. Audio Sources: Users may want to choose which audio source(s) they want to record, such as system audio, microphone input, or both.
3. Recording Quality: Users may want to adjust the recording quality to suit their needs. Higher-quality recordings will result in larger file sizes.
4. Frame Rate: Users may want to choose the frame rate of the recording, which determines how many frames are captured per second. Higher frame rates will result in smoother recordings but larger file sizes.
5. Recording Duration: Users may want to set a specific duration for the recording, which can be helpful if they only want to capture a particular event or segment.
6. Output Format: Users may want to choose the output format for the recording, such as MP4, MOV, or other formats.
7. Sharing Options: Users may want to choose how and where to share the recording after it's been captured, such as uploading it to a cloud service, sending it via email, or saving it to their device.
8. Watermark: Users may want to add a brand watermark or customized watermark to avoid their videos being used by others.

These flexible customization options can help users create high-quality recordings that meet their specific needs and requirements. You see that, QuickTime can not offer so many features. Professional Mac screen recorders can support these and bring you more.
Method 2. Use Mac Screen Recorder
Among multiple Mac Screen Recorders in the market, here recommend two easy-to-use and user highly-acclaimed tools for you, Filmora Screen Recorder and Movavi Screen Recorder. If you want to compare more recording software for Mac, you can go to this best Mac Screen Recorder review for more reference.
Why Filmora Screen Recorder
Filmora Screen Recorder is a user-friendly software for capturing high-quality screen recordings on Windows and Mac computers. It offers various recording options, editing tools, and export formats, making it suitable for creating instructional videos, tutorials, gameplays, and more.
Main Features:
1. Intuitive interface
2. Multiple capture modes: Filmora Screen Recorder offers several capture modes, including full-screen recording, custom screen recording, and webcam recording.
3. High-quality recording: The software can record video at up to 60 frames per second (FPS) with audio, and it supports various output formats, including MP4, MOV, and GIF.
4. Audio capture: Filmora Screen Recorder allows users to record system audio, microphone input, or both, making it ideal for creating tutorial videos, gaming videos, or any other type of video that requires audio.
5. Editing tools: The software has basic editing tools that enable users to trim unwanted parts, add captions or callouts, and adjust the video's brightness, contrast, and saturation.
6. Cursor effects: Filmora Screen Recorder offers various cursor effects, including highlight, click sound, and click effect, which are useful for creating tutorial videos.
7. Scheduled recording: You can schedule a recording session in advance, which is useful for recording webinars, online meetings, or any other time-sensitive events.
8. Sharing options: Users can easily share their recordings on social media, YouTube, or Vimeo directly from the program interface.
How to Record Screen on Mac with Filmora Screen Recorder
Step 1. Install Filmora Screen Recorder
Download and install Filmora Screen Recorder on your Mac from the official website.
Step 2. Select Recording Settings
Launch the program and choose recording settings for the screen size, audio input, video quality, and frame rate.

Step 3. Start Recording
Click on the "REC" button to start recording your screen. Pause or stop the recording at any time and save the file in your preferred format.

Why Movavi Screen Recorder
Movavi Screen Recorder is an easy-to-use recording software that enables users to capture and record everything happening on their Mac screen. With the ability to record video and audio simultaneously, users can create instructional videos, tutorials, and presentations. It also offers editing tools and a range of export options for saved recordings.
Main Features:
1. Easy-to-use interface
2. Flexible capture options
3. Supports multiple output formats
4. Record with system audio, microphone input, or both
5. Basic editing features
6. Also supports scheduled recording
How to Record Screen on Mac with Movavi Screen Recorder
Step 1. Download and install Movavi Screen Recorder to your Mac.
Step 2. Open the software and select the recording area, audio source, and quality.
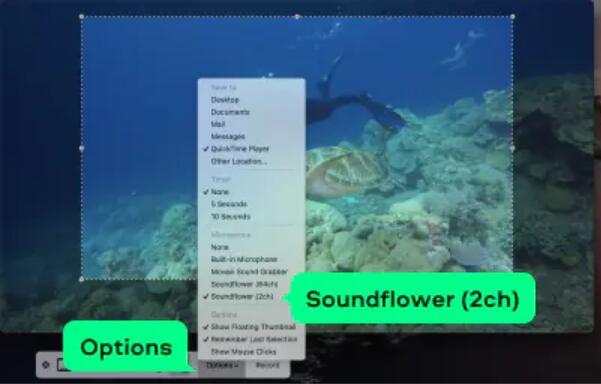
Step 3. Click the "REC" button to start recording your screen and use the Pause and Stop buttons to control the recording.
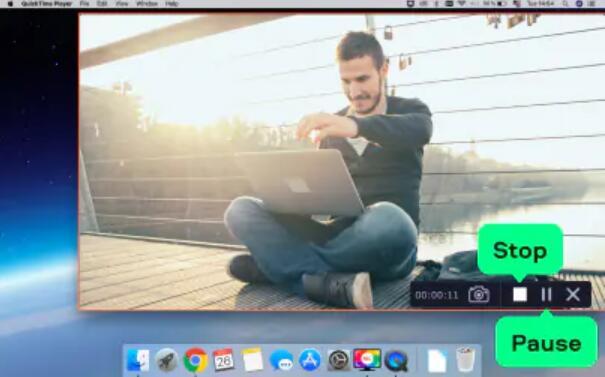
Step 4. Once finished, click the Stop button and the recording will be saved automatically to your designated folder.
Comparison of the Two Mac Screen Recorders
Both Filmora Screen Recorder and Movavi Screen Recorder are great recording tools with many similar features, however, there are some differences in terms of pricing, editing tools, output formats, and customer support.
As you can see, Filmora Screen Recorder has a free trial and a little bit higher yearly subscription. Movavi Screen Recorder also has a free trial. However, Filmora offers better editing tools than Movavi.
Both tools can record for a long time and offer three recording quality options. Filmora Screen Recorder won't add a watermark, but Movavi Screen Recorder does with the free version.
The Bottom Line
The article outlines several different methods for recording the screen on a Mac, depending on your needs and preferences. The first method is using the built-in QuickTime Player application, other methods involve using third-party applications. And explains how to download and set up these applications, as well as how to use them to record Mac screens.
This a comprehensive guide to recording the screen on a Mac for you, and is a helpful resource for anyone looking to create high-quality screen recordings. If you think it is helpful, please share it with your friends.
